Search
Documentation
- Admin Dashboard
- XR Training
- Task Management
- Remote Support
Need more help?
SupportCreating Multi-platform Lessons
Xplorer is capable of being played in multiplayer on multiple platforms, but there are a few steps to make sure your lesson will be compatible on all devices. You need to make sure you have models that will work on all the desired devices.
Using Platform Specific Abscenes
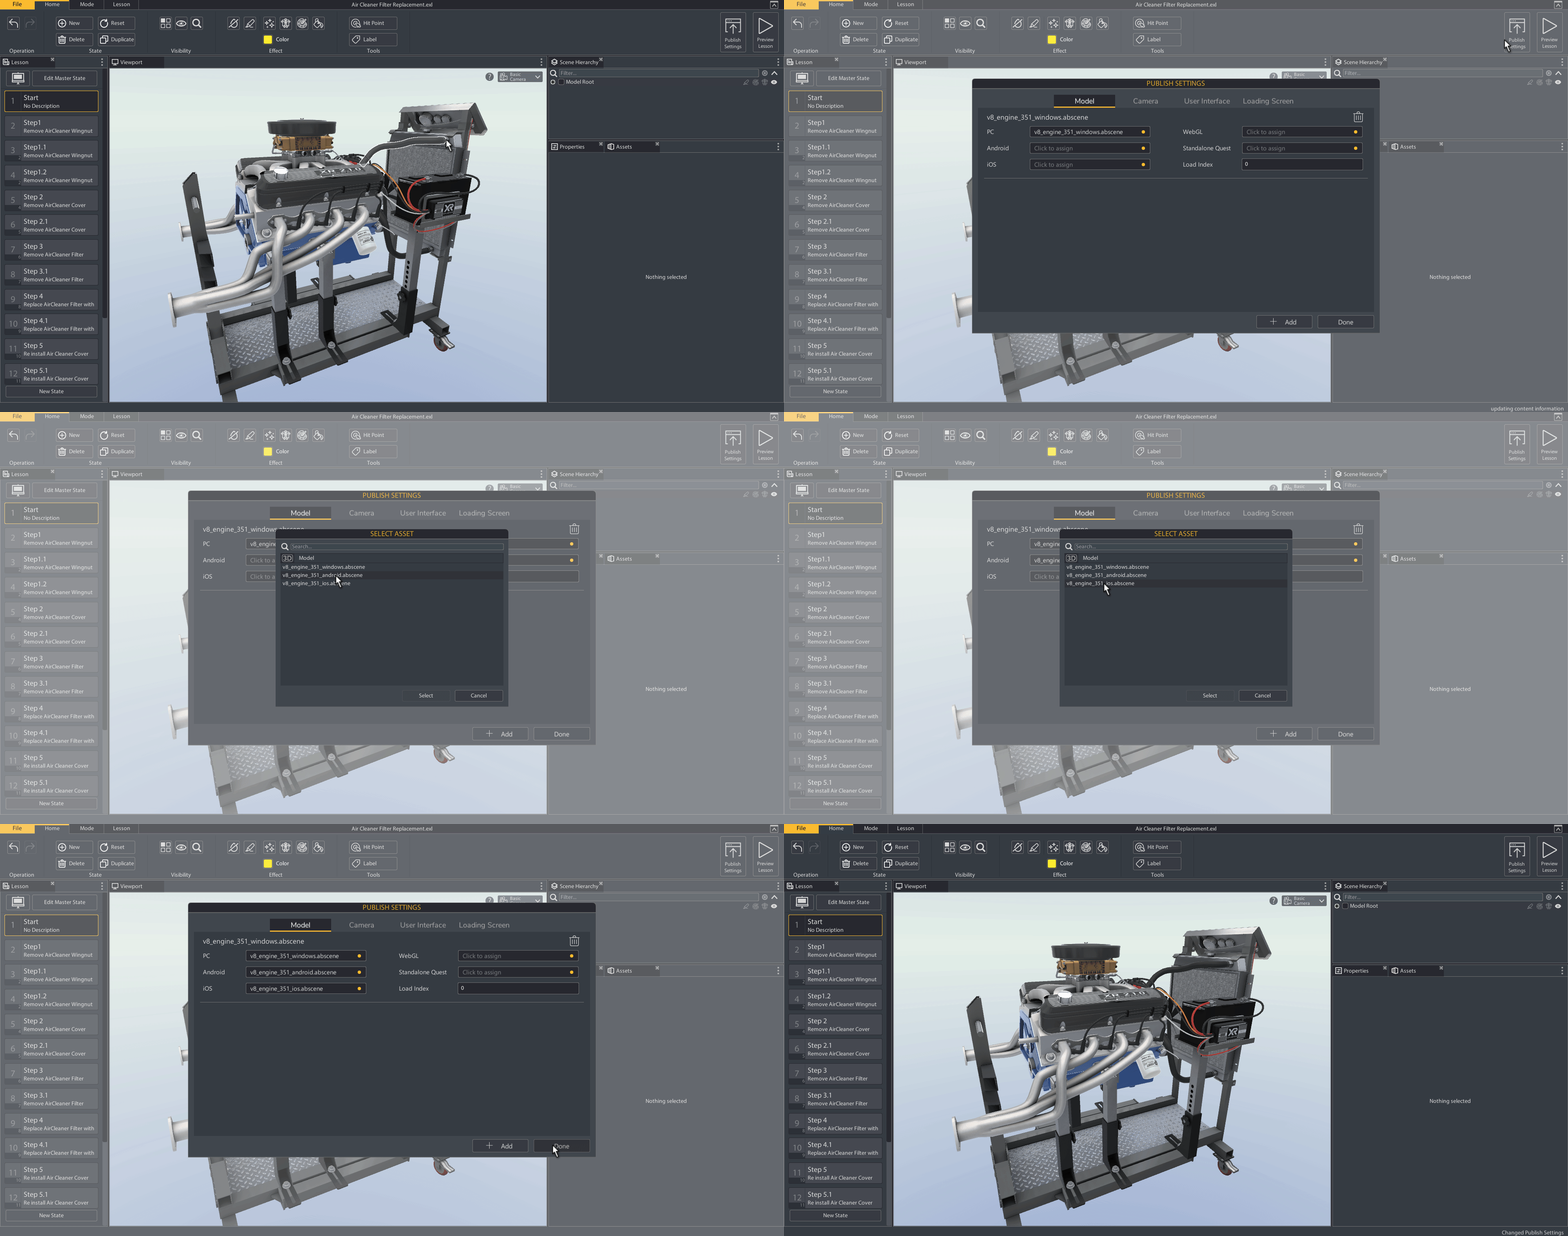
Mobile devices aren't nearly as powerful as many PC's, therefore you may want to create your Android models at a lower quality than the models you will use for PC. Regardless if you change the quality or not, you will need a specific android or iOS version of the model. In the Xplorer Creator we can specify which models will be used when the Player downloads the lesson from that device type (Android, iOS, PC, WebGL).
If you are creating your lesson with Abscenes follow these steps:
- Import your Models into Xplorer by dragging and dropping them into the portal project or File > Import in the Xplorer.
- Click the Publish Settings button in the Lesson Ribbon to open up the publish settings dialog.
- Under the Model tab click on each platform input and assign the corresponding model file for each model listed.
Now when the lesson is downloaded in the player it will use the proper model.

Using an FBX
FBX is a platform agnostic model. You will only need the one version. The FBX will automatically be considered compatible with all platforms with no extra action.
Next: Augmented Reality

