Lesson Tab

Skyboxes
All lessons are originally created using a default skybox. You can import your own custom skybox through the Create Skybox button.
Ambient light and Scene light
Controls the brightness of the scene. The default values are 0.5. Turning them up will make the objects in the scene appear brighter.
Specifically, Ambient is a general light with no direction, while Scene light has a direction and gives depth.
However both Ambient and Scene lights don't have effect on scenes that have lighting baked in.
Types of Skyboxes
There are 4 types of skyboxes you can create:
Generated
Generated Skyboxes allow you to change the color gradient and shape of the default skybox. In the Import Skybox dialog choose the "Generated" tab. Here you can choose the skybox shape from the drop down selector. Then choose the top and bottom colors for the gradient. You will see a preview of your gradient in the preivew window on the right. Give your new skybox a name and click Import. Choose a save folder in your project or just hit save to save it to the root folder.
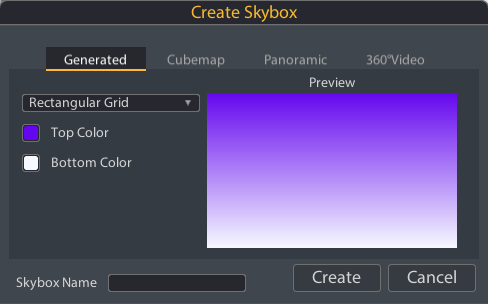
This will generate the skybox and it will now appear in the skybox dropdown in the Lesson Ribbon.
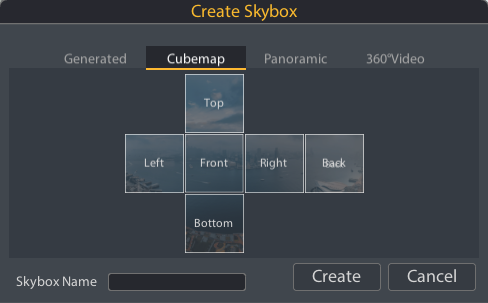
Cubemap
The cubemap skybox allows you to use your own images for all sides. In the Cubemap tab you are presented with an unfolded cube. Click on a cube face to assign an image to it. The file system dialog will open to your current project folder to select an image that you have already imported, or you can import a new image by selecting one that is outside the project folder. Name the skybox and save it to a folder in your project. This new skybox will show in the skybox dropdown selector in the Lesson Ribbon.
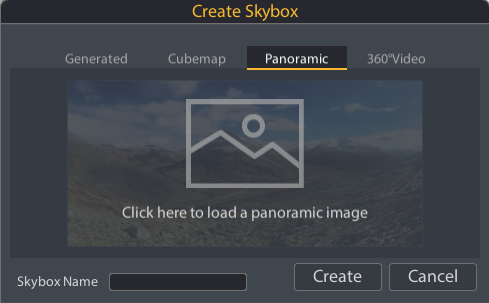
Panoramic
The Panoramic skybox lets you create a skybox out of a panoramic image. Click on the image panel to open the file system dialog. It will open to your current project folder to select an image that you have already imported, or you can import a new image by selecting one that is outside the project folder. Name the skybox and save it to a folder in your project. This new skybox will show in the skybox dropdown selector in the Lesson Ribbon.
360 Video
The 360 video skybox lets you create a skybox out of a 360 video. Click on the video panel to open the file system dialog. It will open to your current project folder to select a 360 video that you have already imported, or you can import a new video by selecting one that is outside the project folder. Name the skybox and save it to a folder in your project. This new skybox will show in the skybox dropdown selector in the Lesson Ribbon.

Properties
Augmented Reality Settings
The AR Settings allow you to manage the Augmented Reality options available in your lesson. Clicking on this button will open the AR properties in the Properties tab.
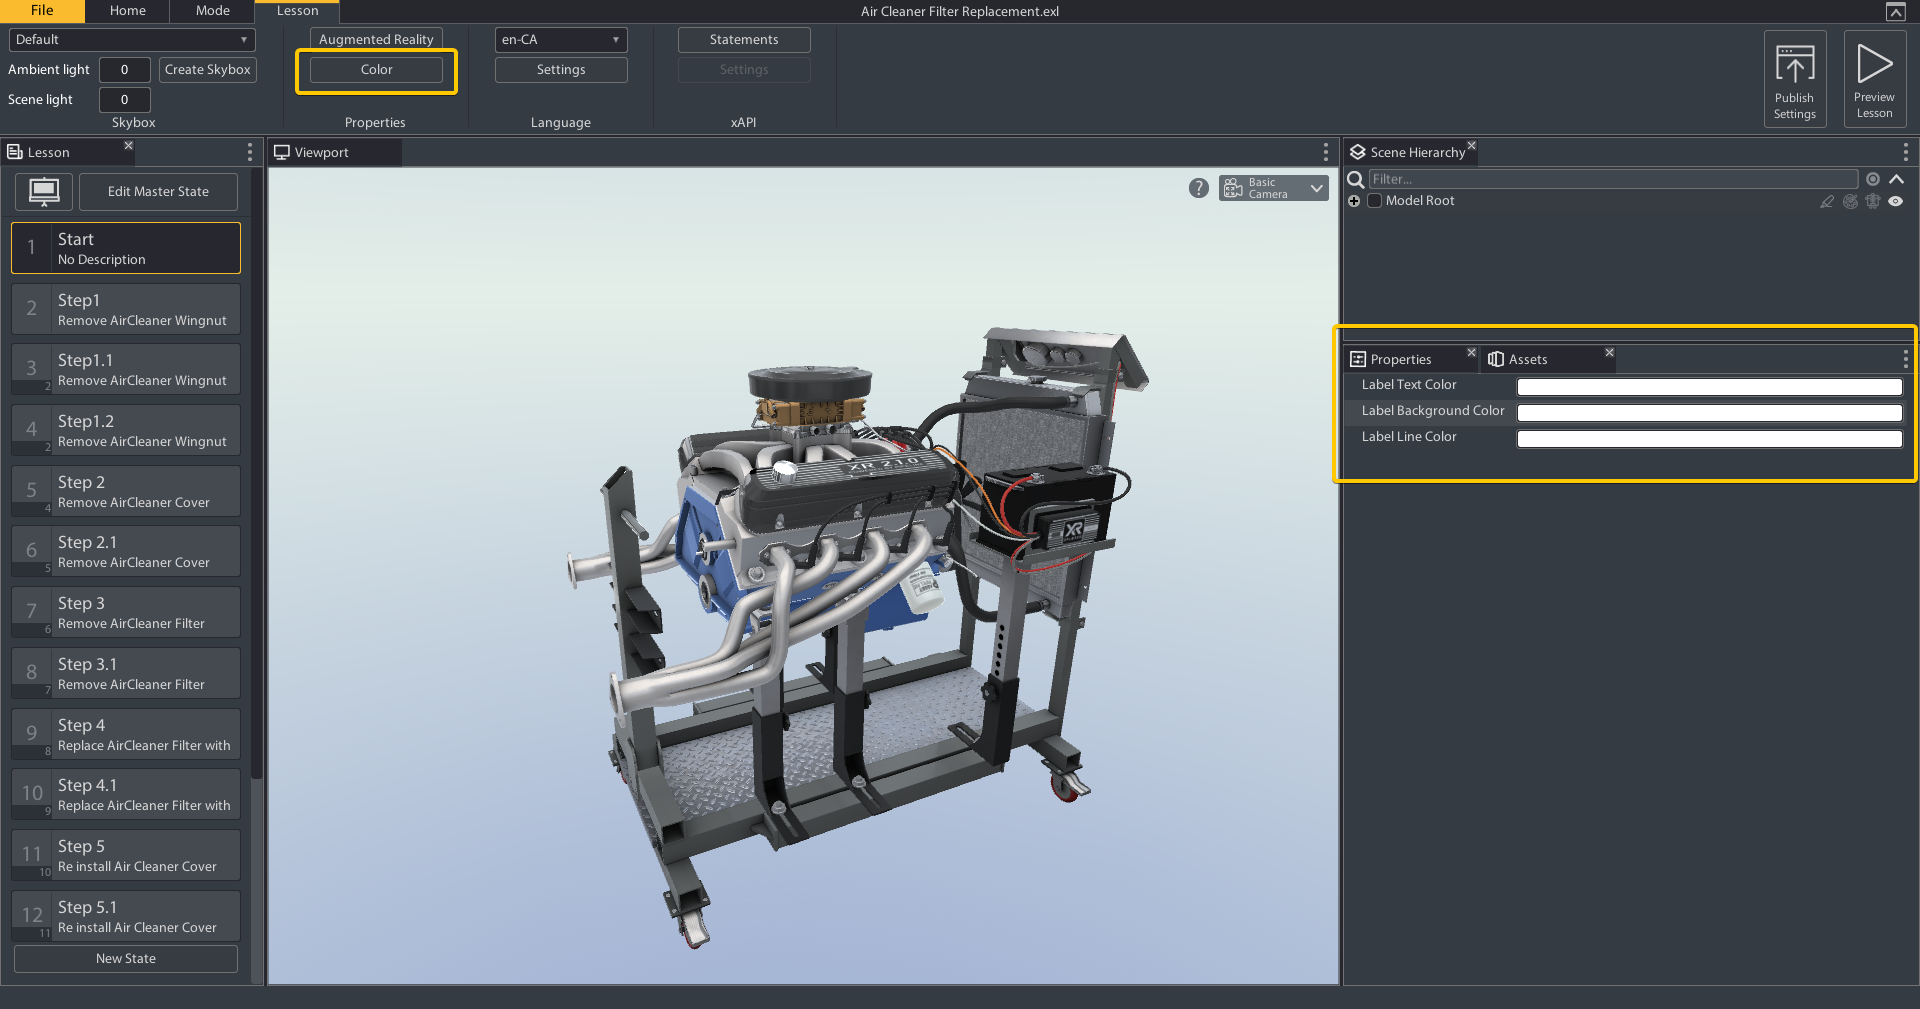
Color
The Color properties allow you to set the default colors for the whole lesson. When you click on this button it will open the color properties for the lesson in the Properties tab.
Languages
The Languages section allows you to select the language the content is displayed in. That way you can update the text and assets in the creator and preview the lesson in different languages. The Setting dialog lets you add new languages to the language selector and upload and download CSV files containing Localization values.
See Content Localization for more details
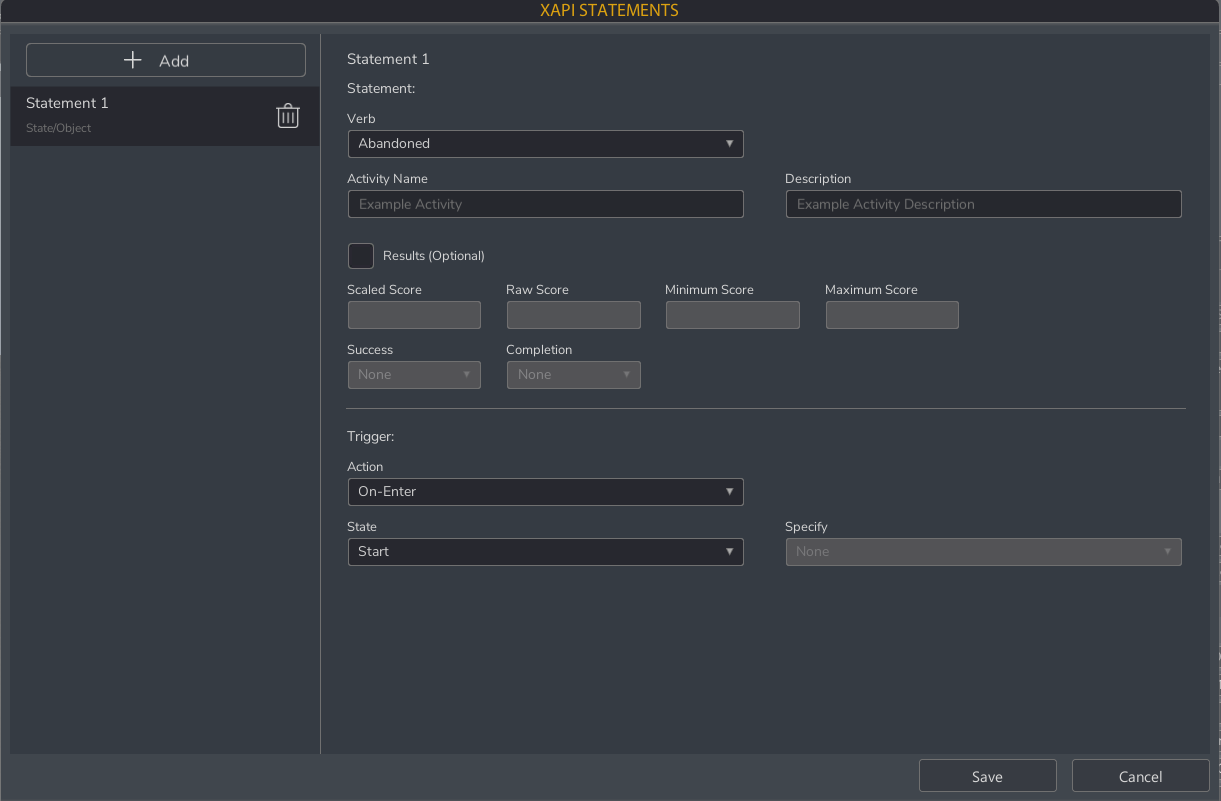
xAPI
The xAPI section allows you to add xAPI statements throughout the lesson.