Augmented Reality
Within the Xplorer Editor you can make your Lesson playable in augmented reality so devices that support AR will have the option to display the model in their real world environment.
AR Shared Properties:
- AR Root: The object and all its children that will appear when anchored in AR.
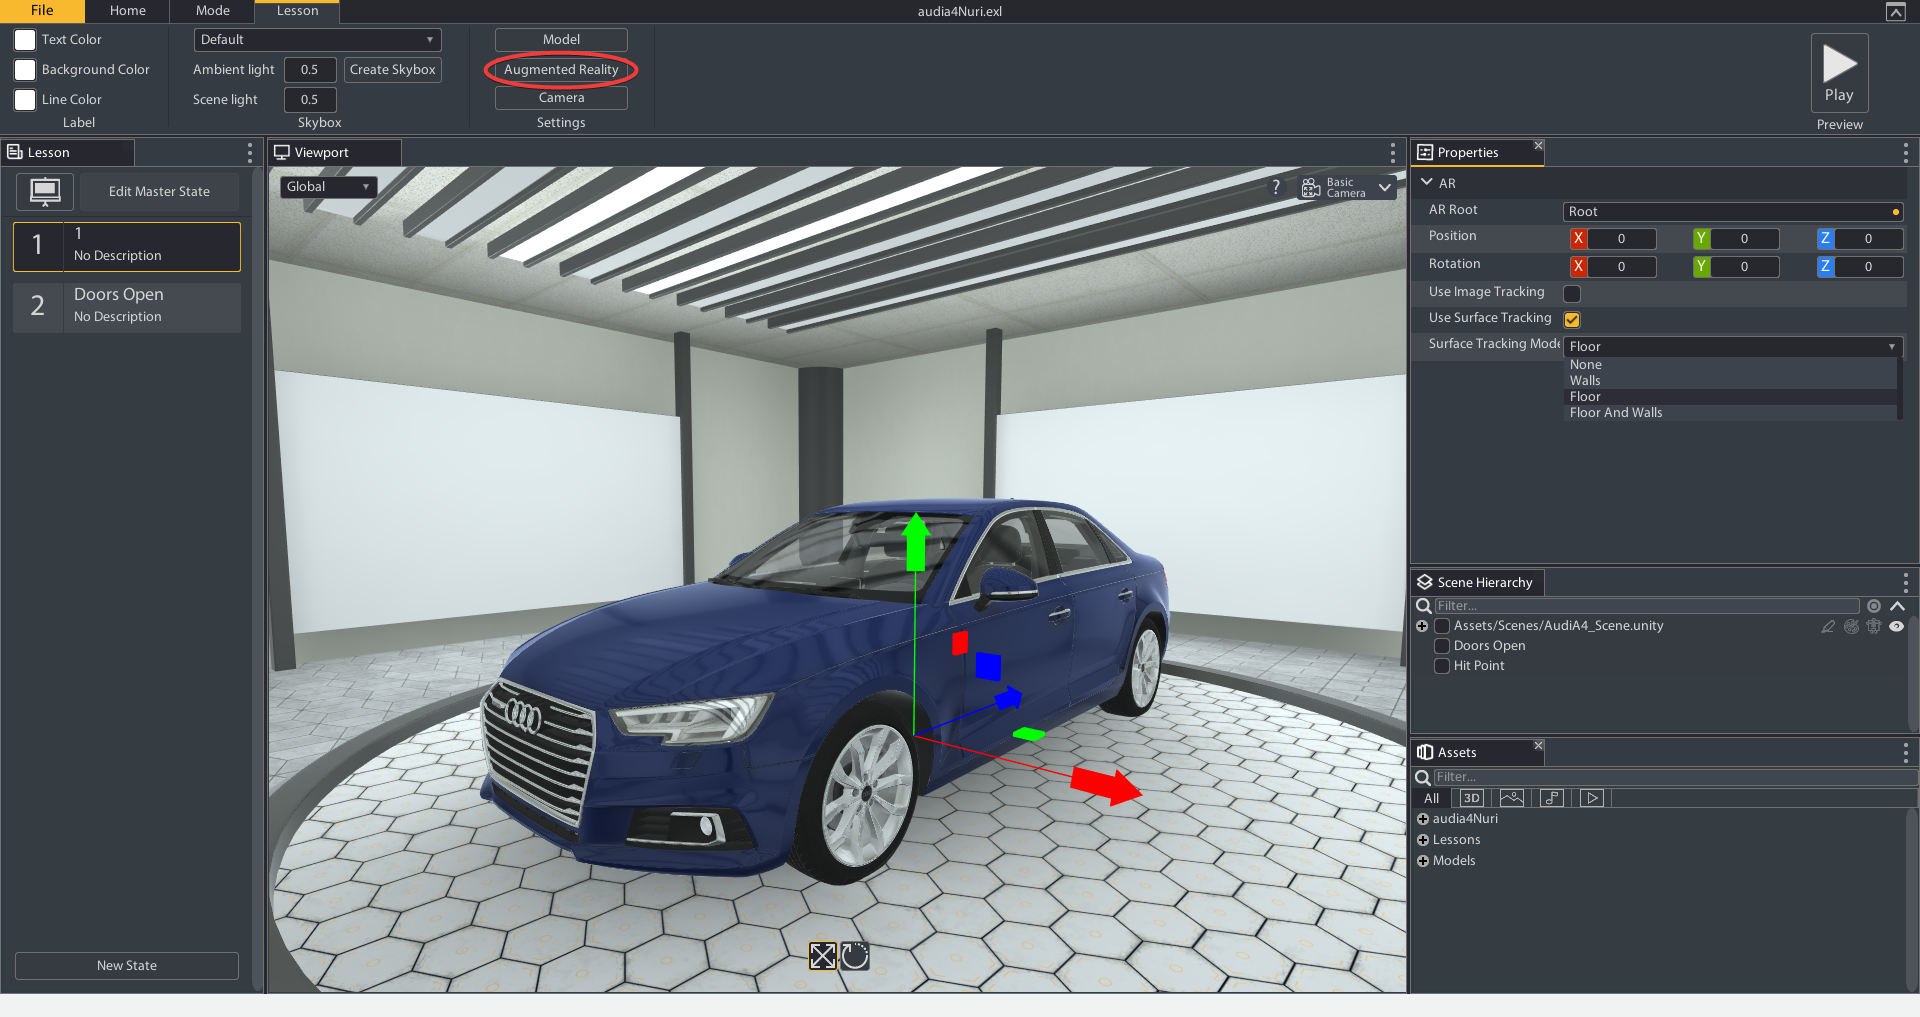
- Position: The position of the AR Pivot point. This is how the model will appear relative to the anchor point (where the model is placed in the real world). The Pivot point as set in the image below (referenced in Surface Tracking AR Section) will set the right wheel just above the real world floor. If the pivot height was set halfway up the model then the model would be halfway in the floor.
- Rotation: The rotation of the AR Pivot point. This is how the model will appear relative to the anchor point. The Blue arrow (local Z-Axis) will always point in the direction you are facing when anchored in the real world. When anchored to the floor, based on the pivot point in the picture below, the Spitfire will appear with the nose of the plane fully facing the user straight on.
Surface Tracking AR
Tips for selecting right surface for AR tracking:
- Avoid smooth surfaces like walls with no patterns.
Editor Setup
In the Editor you will need to set the AR properties of the lesson.
Click the "Augmented Reality" button in the Settings section of the Lesson Ribbon. The Settings will appear in the Properties Tab.
Set the AR Root by dragging and dropping a model part from the scene hierarchy to the AR Root property.
Set the AR Pivot using the position and rotation gizmos.
Check off Use Surface Tracking.
Set the default Surface Tracking Mode.
Surface Tracking Properties:
- Use Surface Tracking: When toggled on the option for Surface Tracking AR is enabled for the lesson. Devices that are AR compatible will have the option to view the model in AR by anchoring it to the floor or wall.
- Surface Tracking Mode: Choose whether the model tracks the floor, wall, or both. This can also be changed within the player.
Anchoring in the Player
With the lesson loaded in the player, here is how you can anchor the model in AR:
Select the AR Mode from the middle menu. (This will only show if any type of AR tracking was enabled in the lesson and your device is compatible with AR)
Press the Enable AR button and grant access for Xplorer to use the camera.
If you have floor tracking selected, scan the camera over the floor slowly. If you have wall tracking selected, you can do the same to the walls. A transparent white mesh will gather over the scanned areas.
Once you have an area of the floor/wall tracked you can anchor the model by pressing the Anchor button. The model will appear according to how the AR pivot was set.
Image Tracking AR
Tips for selecting right image for AR tracking:
- The image's resolution should be at least 300 x 300 pixels. Using images with high resolution does not improve performance.
- Reference images can be provided in PNG or JPEG file format.
- Color information is not used. Both color and equivalent grayscale images can be used as reference images or by users at runtime.
- Avoid images with heavy compression as this interferes with feature extraction.
- Avoid images that contain a large number of geometric features, or very few features (e.g. barcodes, QR codes, logos and other line art) as this will result in poor detection and tracking performance.
- Avoid images with repeating patterns as this can also cause issues with detection and tracking.
In the Editor you will need to set the AR properties of the lesson.
Click the "AR Settings" button in the Lesson Ribbon. The Settings will appear in the Properties Tab.
Set the AR Root by dragging and dropping a model part from the scene hierarchy to the AR Root property.
Set the AR Pivot using the position and rotation gizmos.
Check off Use Image Tracking.
Drag and drop the Image asset you want to track.
Enter the width in meters of the physical copy.
Image Tracking Properties:
- Use Image Tracking: When toggled on the option for Image Tracking AR is enabled for the lesson. Devices that are AR compatible will have the option to anchor the model to a specified image.
- Image: The image that will be tracked in the lesson
- Image Width (m): The width of the physical image that will be tracked in the real world.