Hit Points
Hit Points are used to add text into the 3D space and can be used to allow users to trigger on-click actions such as changing a state or lesson, displaying videos, images or facts, and playing audio files or animations.
You can also customize the appearance of a Hit Point itself by loading different background images or videos.
Hitpoints can point directly to an object with a target line to function as a 3D label when you drag the object from the scene hierarchy into the hitpoints target property.
Example: Adding a Hitpoint with on-click action
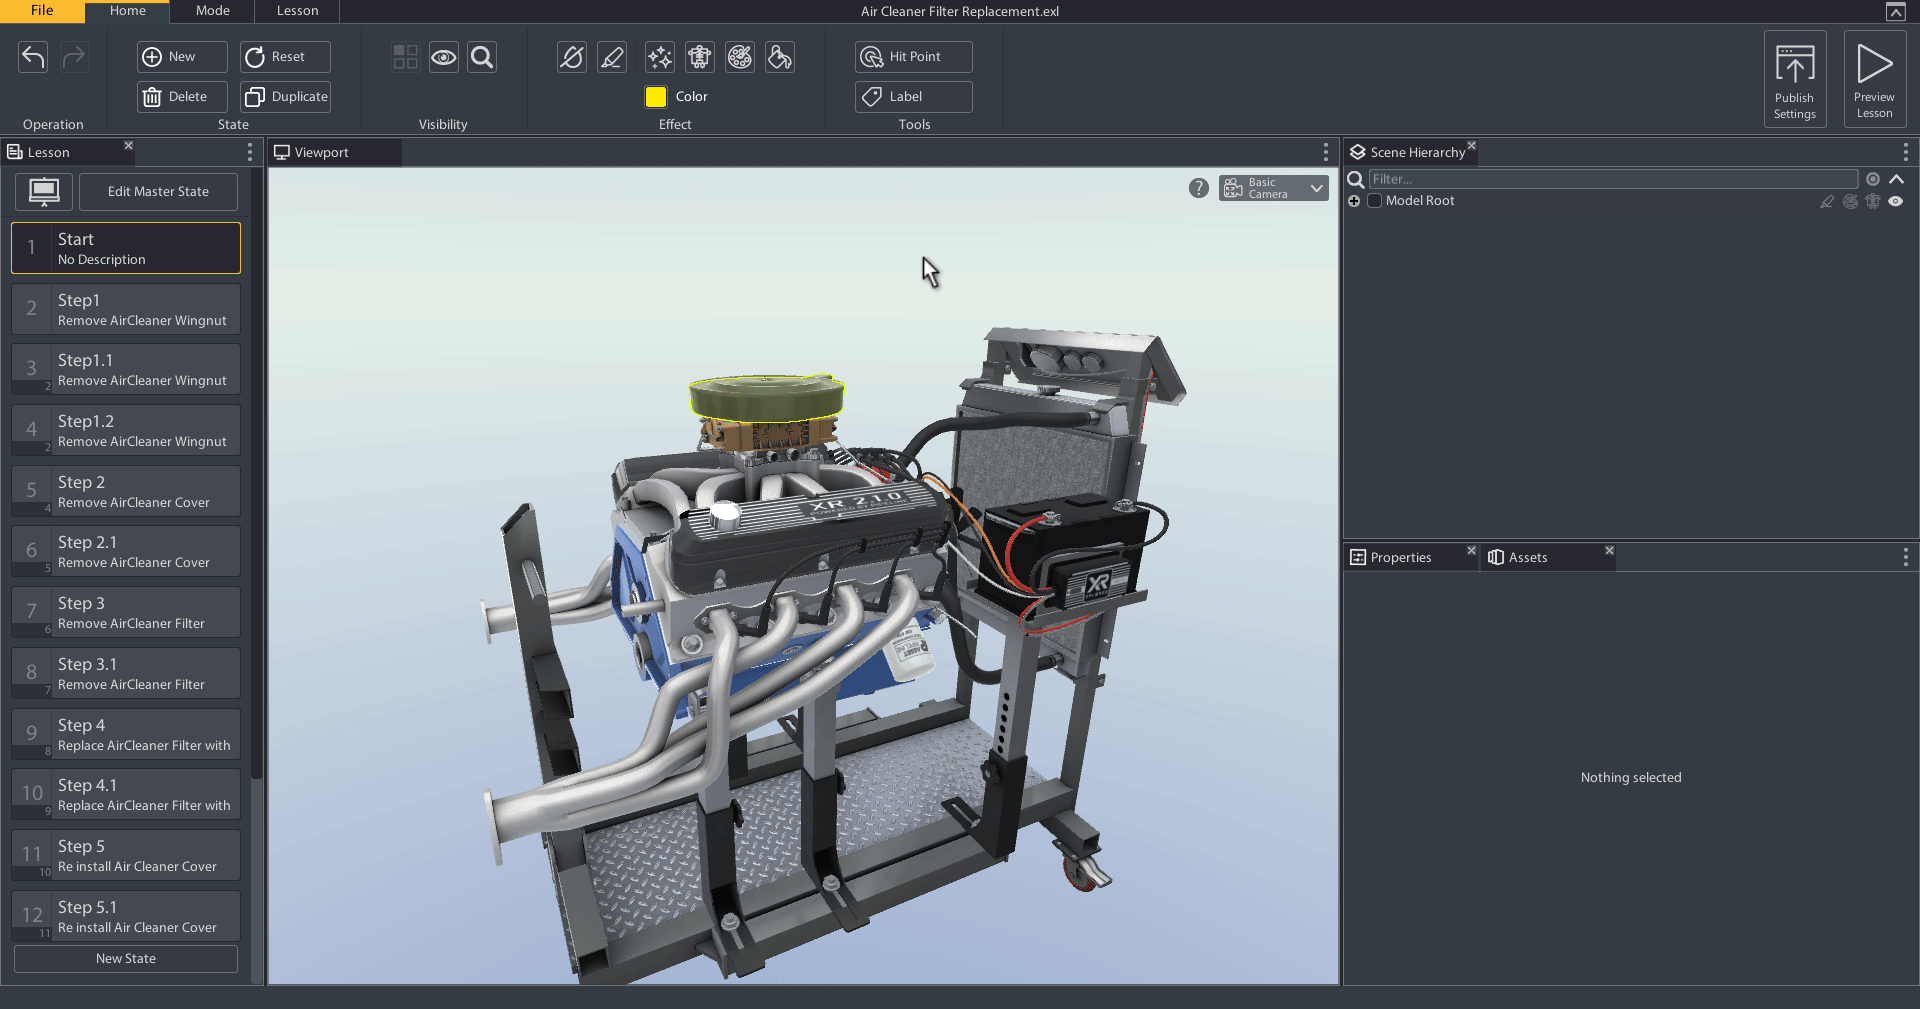
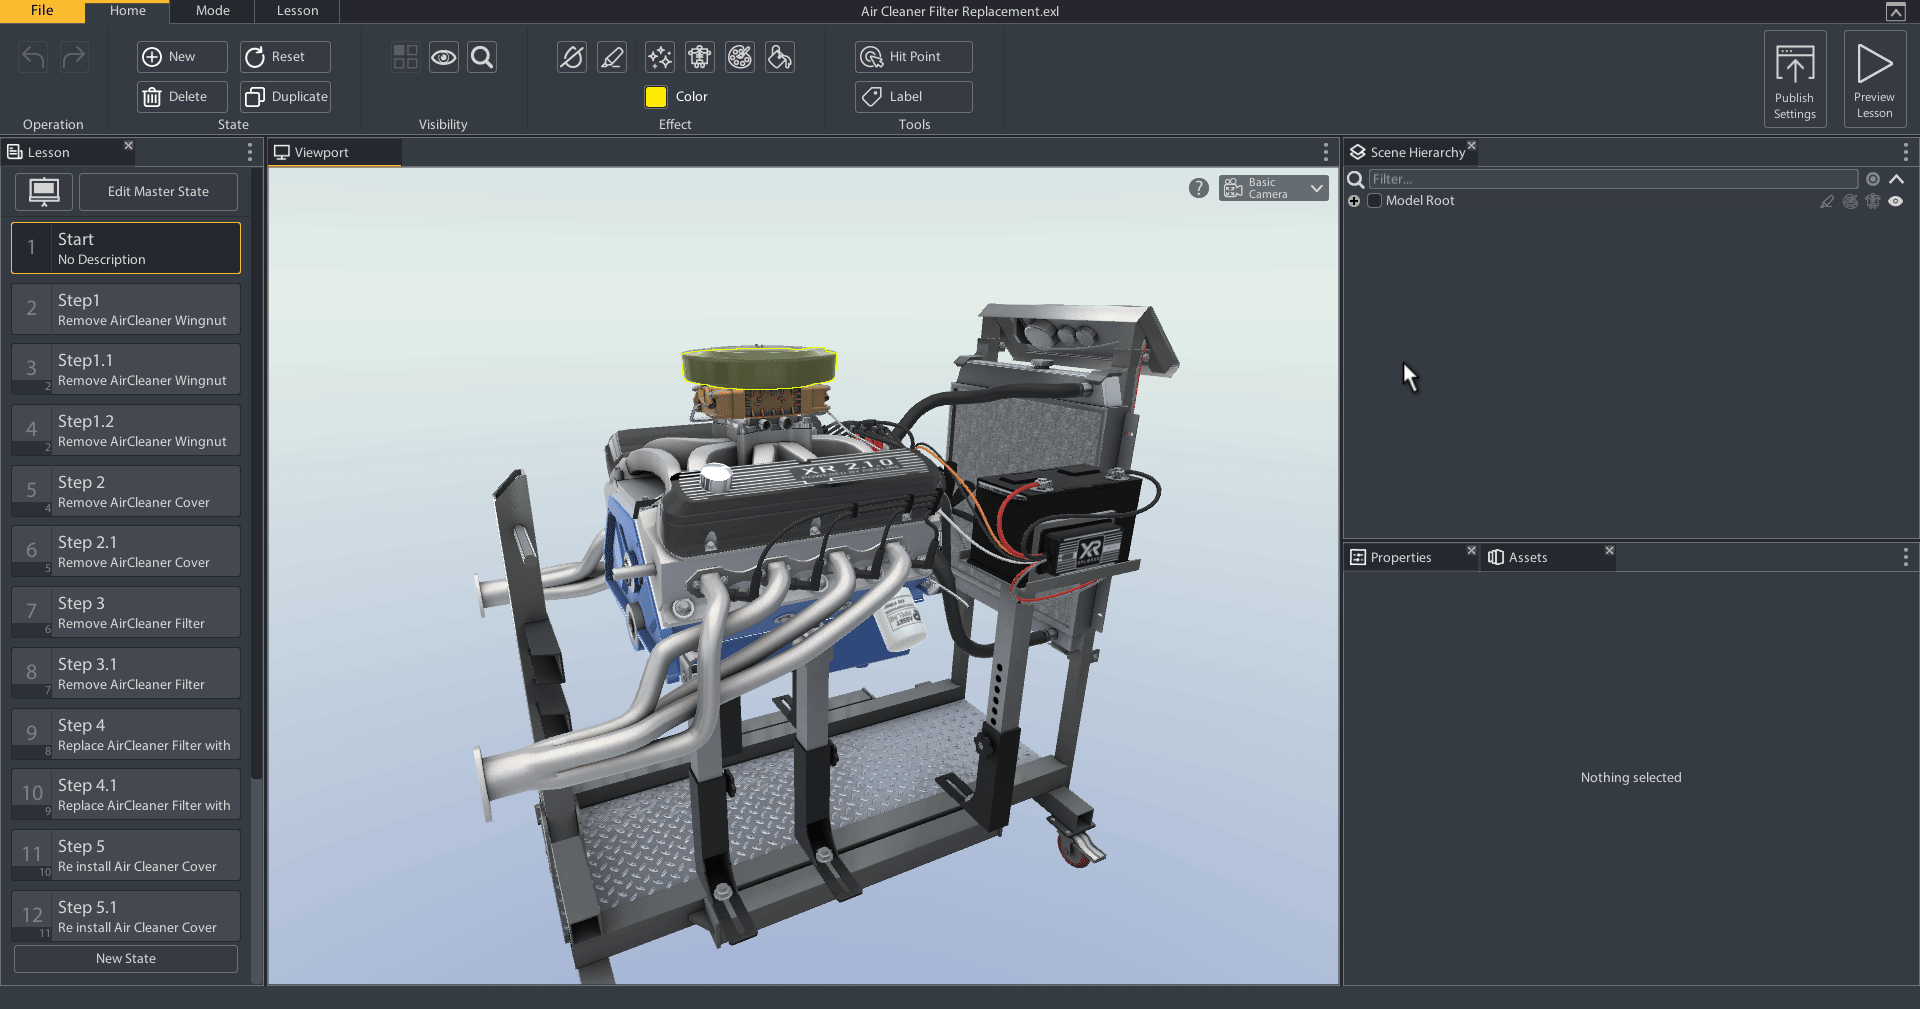
- Click on the Hit Point button in the Home Tab
- Click on an object in the viewport to place the Hit Point
- Select the Hit Point and go to the properties tab
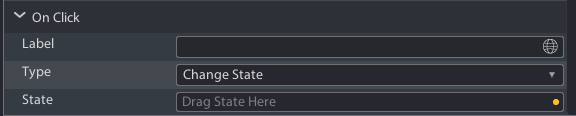
- Go to the On-Click section and select Change State from the type dropdown
- Drag a state from the lessons tab into the state property in properties tab
Now, when the hitpoint is clicked in play mode, the state will switch to whatever state is linked in the Hit Point.
Onclick Actions
With a Hit Point selected on click actions are set in the properties tab.
Change State
The Change state action will transition the scene from the current state to the specified state. When adding a Change state action type to a hitpoints onclick you will only need to provide the target state. The speed the state will transition is dependent on the State Transition and Camera Transition timing set on the state being transitioned to.
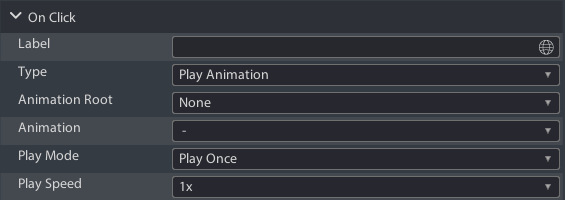
Play Animation
The Play Animation action will play the selected embedded animation. Animations are embedded in a model during model creation. If a model has an animation you can trigger it by Clicking the hit point. How the animation is played depends on the properties you set:
- Animation Root: The model that contains the animation
- Animation: The specific animation under the animation root that you want to trigger
- Play Mode: How to play the animation (once, loop, ping pong)
- Play Speed: What speed to play the animation at (1x, 2x, 0.5x etc..)
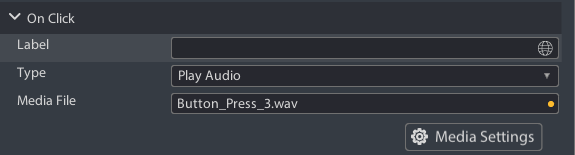
Play Audio
The Play Audio action will play the specified audio click when triggered. You just need to set the audio file to play on-click. If you need to edit the audio file properties such as length or volume you can do that with the media settings button. Only the edited copy of the audio file will be included in the final lesson download.
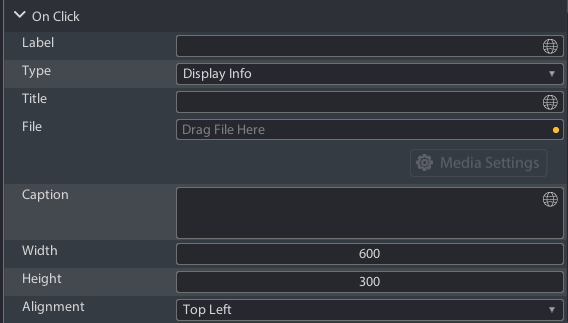
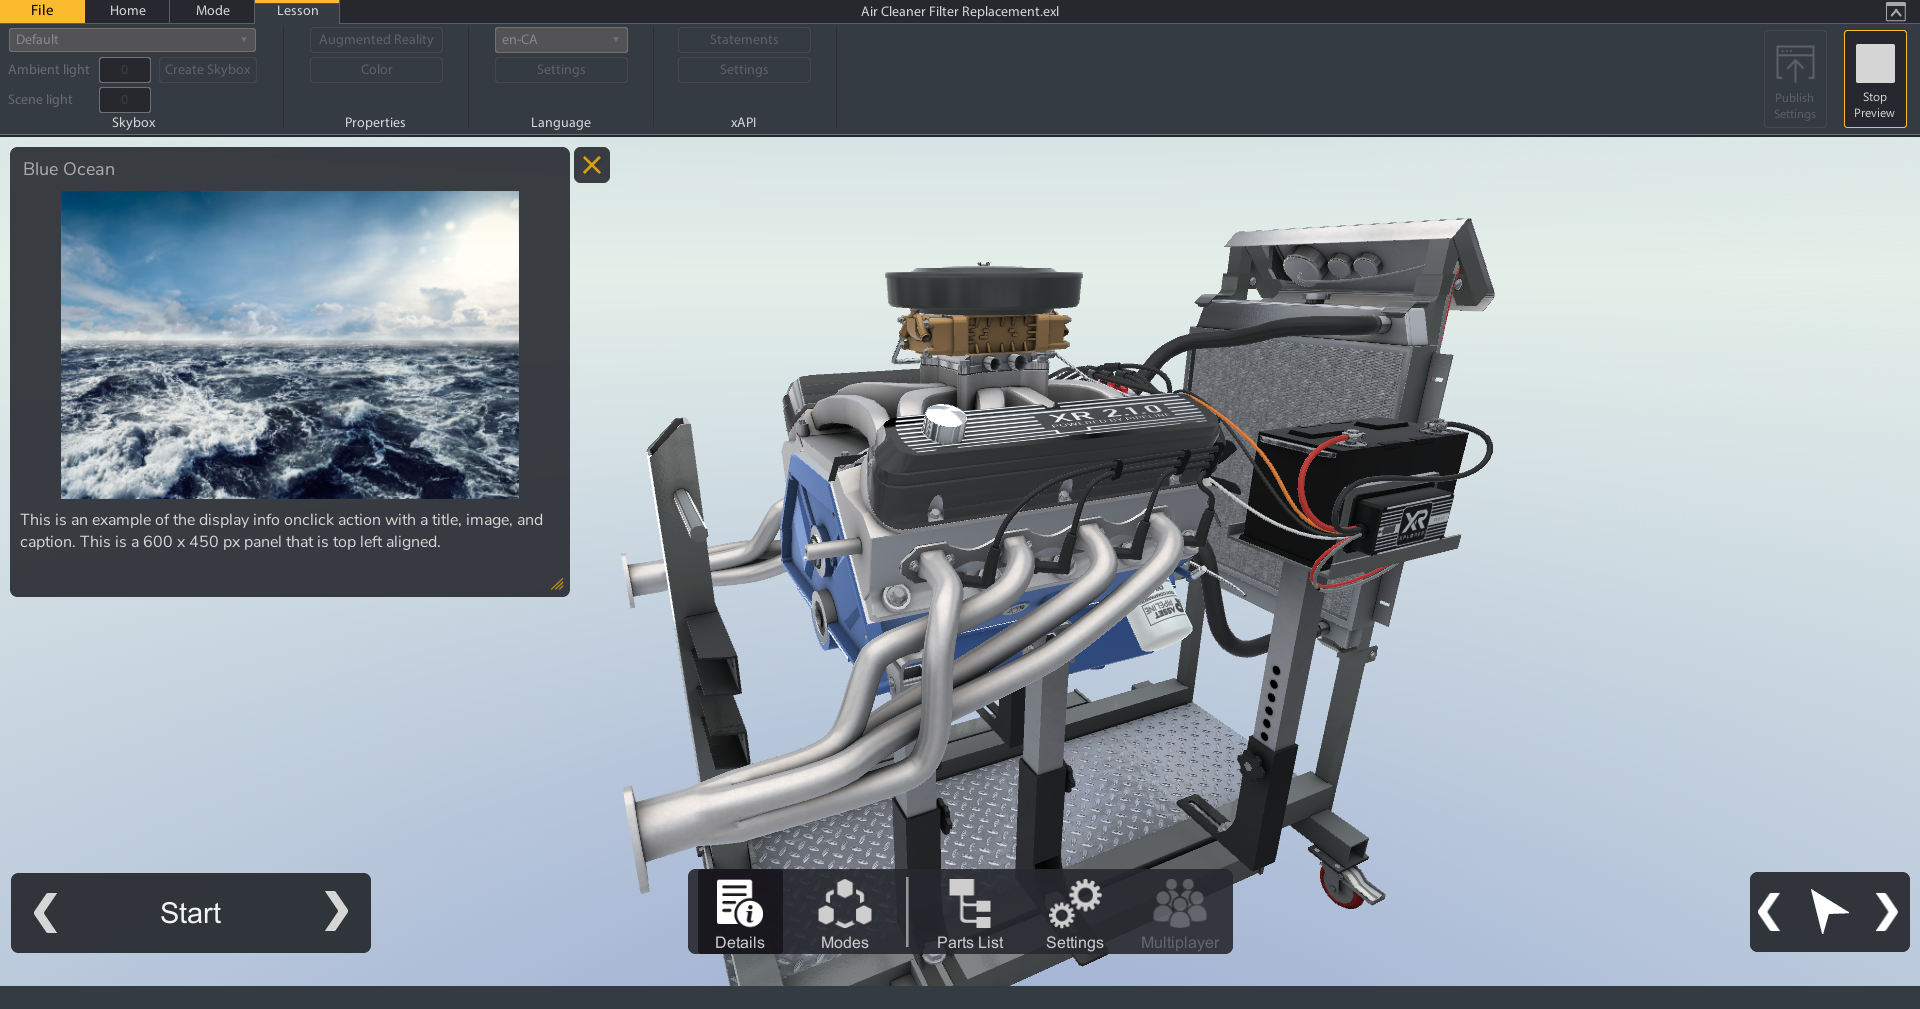
Display Info
The Display Info action will display a 2D panel on the screen containing the provided information properties:
- Title: The text that will appear at the top of the panel
- File: An optional image or video file
- Caption: Optional text field that appears under the file
- Width: Default width of the information panel as it appears on the screen in pixels
- Height: Default height of the information panel as it appears on the screen in pixels
- Alignment: The poition on the screen the panel will appear when triggered
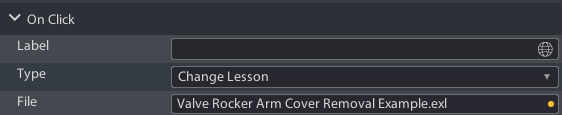
Change Lesson
The Change Lesson action will transition the scene from the current lesson state to the first state in the specified lesson. When adding a Change Lesson action type to a hitpoint's onclick you will only need to provide the target lesson file. After triggering a lesson change the user will experience a loading screen during the tranisiton between lessons.
3D Labels
3D labels are just pre-customized Hit Points to target a specific model and hide their background. They have all the properties of a Hit Point. To create a 3D label quickly:
- Select a model part from the viewport or hierarchy tab
- Click the 3D label tool from the Home Ribbon, in the tools section
- Move the label around in the viewport or through the Properties tab
- modify the text, line, and color through the properties tab
Note: You can set the default background, line, and text colour for all hitpoints from the Lesson Ribbon > Color button > Properties tab.